
Death Valley Photography Guide: Locations & Safety
A comprehensive guide to photographing Death Valley National Park's extreme landscapes. From Badwater Basin to Zabriskie Point, discover the best locations, essential safety tips for extreme heat, and optimal timing for capturing this otherworldly desert landscape.

Fine Art Prints
Death Valley photographs made on 4x5 large format film — the salt flats, badlands, and first light. Limited edition fine art prints.
Death Valley Photography: Extreme Conditions, Extraordinary Landscapes
Death Valley National Park is a land of extremes—the hottest, driest, and lowest place in North America. At 282 feet below sea level, Badwater Basin holds the distinction of being the lowest point on the continent, while summer temperatures regularly exceed 120°F (49°C). Yet these same extreme conditions create one of the most visually stunning and photogenic landscapes on Earth.
As a photographer who has spent over two decades working in the American Southwest with large format film cameras, Death Valley presents both the greatest challenges and the most extraordinary rewards. The park's diverse geology—from salt flats to sand dunes, colorful badlands to volcanic craters—offers endless photographic possibilities for those willing to work within its demanding environment.
This guide shares practical information for safely photographing Death Valley, from iconic locations to lesser-known spots, with specific attention to the safety considerations that make this park unique.
Getting There and General Information
Location and Access
Death Valley National Park spans over 3.4 million acres across eastern California and a small portion of Nevada. Primary access points:
- From Las Vegas: 120 miles (2 hours) via Highway 160 and 190
- From Los Angeles: 275 miles (4.5 hours) via Highway 395 or I-15
- From Lone Pine/Highway 395: 100 miles (2 hours) via Highway 190
- From Beatty, Nevada: 8 miles to the park boundary
Park Fees and Hours (2026)
- Entry Fee: $30 per vehicle (7-day pass), covered by America the Beautiful Annual Pass
- Park Hours: Open 24 hours, year-round
- Visitor Center: Furnace Creek Visitor Center, typically 8 AM - 5 PM (seasonal hours vary)
- Commercial Photography: Permit required for commercial work
⚠️ CRITICAL: Extreme Heat Safety
Death Valley is not a metaphor—people die here every year from heat-related illness. Before discussing any photography locations, you must understand the safety requirements:
Summer Months (May - September)
- Temperatures: 110-130°F (43-54°C) during the day
- Ground temperatures: Can exceed 200°F (93°C)
- Photography recommendation: Only sunrise (before 8 AM) or after sunset
- Avoid: Any hiking or extended outdoor activity between 10 AM and 6 PM
Essential Safety Requirements
- Water: Minimum 1 gallon per person per day—more if hiking
- Vehicle: Reliable, well-maintained car with full tank of gas and working AC
- Communication: Cell service is extremely limited; consider a satellite communicator
- Tell someone: Share your itinerary with someone outside the park
- Never leave the paved road unless in a high-clearance 4WD vehicle with proper preparation—many backcountry roads have sharp volcanic rocks that shred tires, so carry at least one spare (two for remote areas like the Racetrack)
- Watch for symptoms: Dizziness, nausea, headache, confusion = get to AC immediately
The heat affects equipment too—batteries drain faster than usual, and film should be kept in a cooler. Plan accordingly and you'll have a safe, productive trip.
Best Times to Visit
Optimal Season: November - March
The ideal photography season offers:
- Comfortable temperatures: 60-75°F (15-24°C) daytime
- Occasional rain that creates rare water reflections
- Lower sun angle for dramatic lighting
- Possibility of snow on surrounding peaks
- Clearer air with less haze
Spring (March - April)
Occasionally wildflower season if winter rainfall was sufficient. Death Valley superblooms are rare—sometimes decades pass between them—so if one is forecast, it's worth rearranging your schedule. Temperatures begin climbing but remain manageable for full-day photography.
Fall (October - November)
Temperatures cooling from summer extremes. October can still be hot (90°F+), but November typically offers excellent conditions. Fewer crowds than winter peak season.
Summer (June - September)
Not recommended for photography. The extreme heat (110-130°F) makes meaningful photography nearly impossible. You're limited to a brief 30-45 minute window at sunrise before temperatures become dangerous, and even then you'll be fighting heat shimmer that destroys image sharpness. Sunset shooting requires waiting in brutal afternoon heat for the light to improve.
Beyond safety concerns, the photography conditions are poor:
- Intense heat shimmer distorts distant subjects
- Hazy air reduces clarity and contrast
- Harsh overhead light for most of the day
- Physical discomfort makes it difficult to concentrate on composition
Save your trip for cooler months. The same locations will be there in November with comfortable temperatures, clearer air, and the ability to actually enjoy the experience. There's no image worth risking heat stroke.
Key Photography Locations
1. Badwater Basin
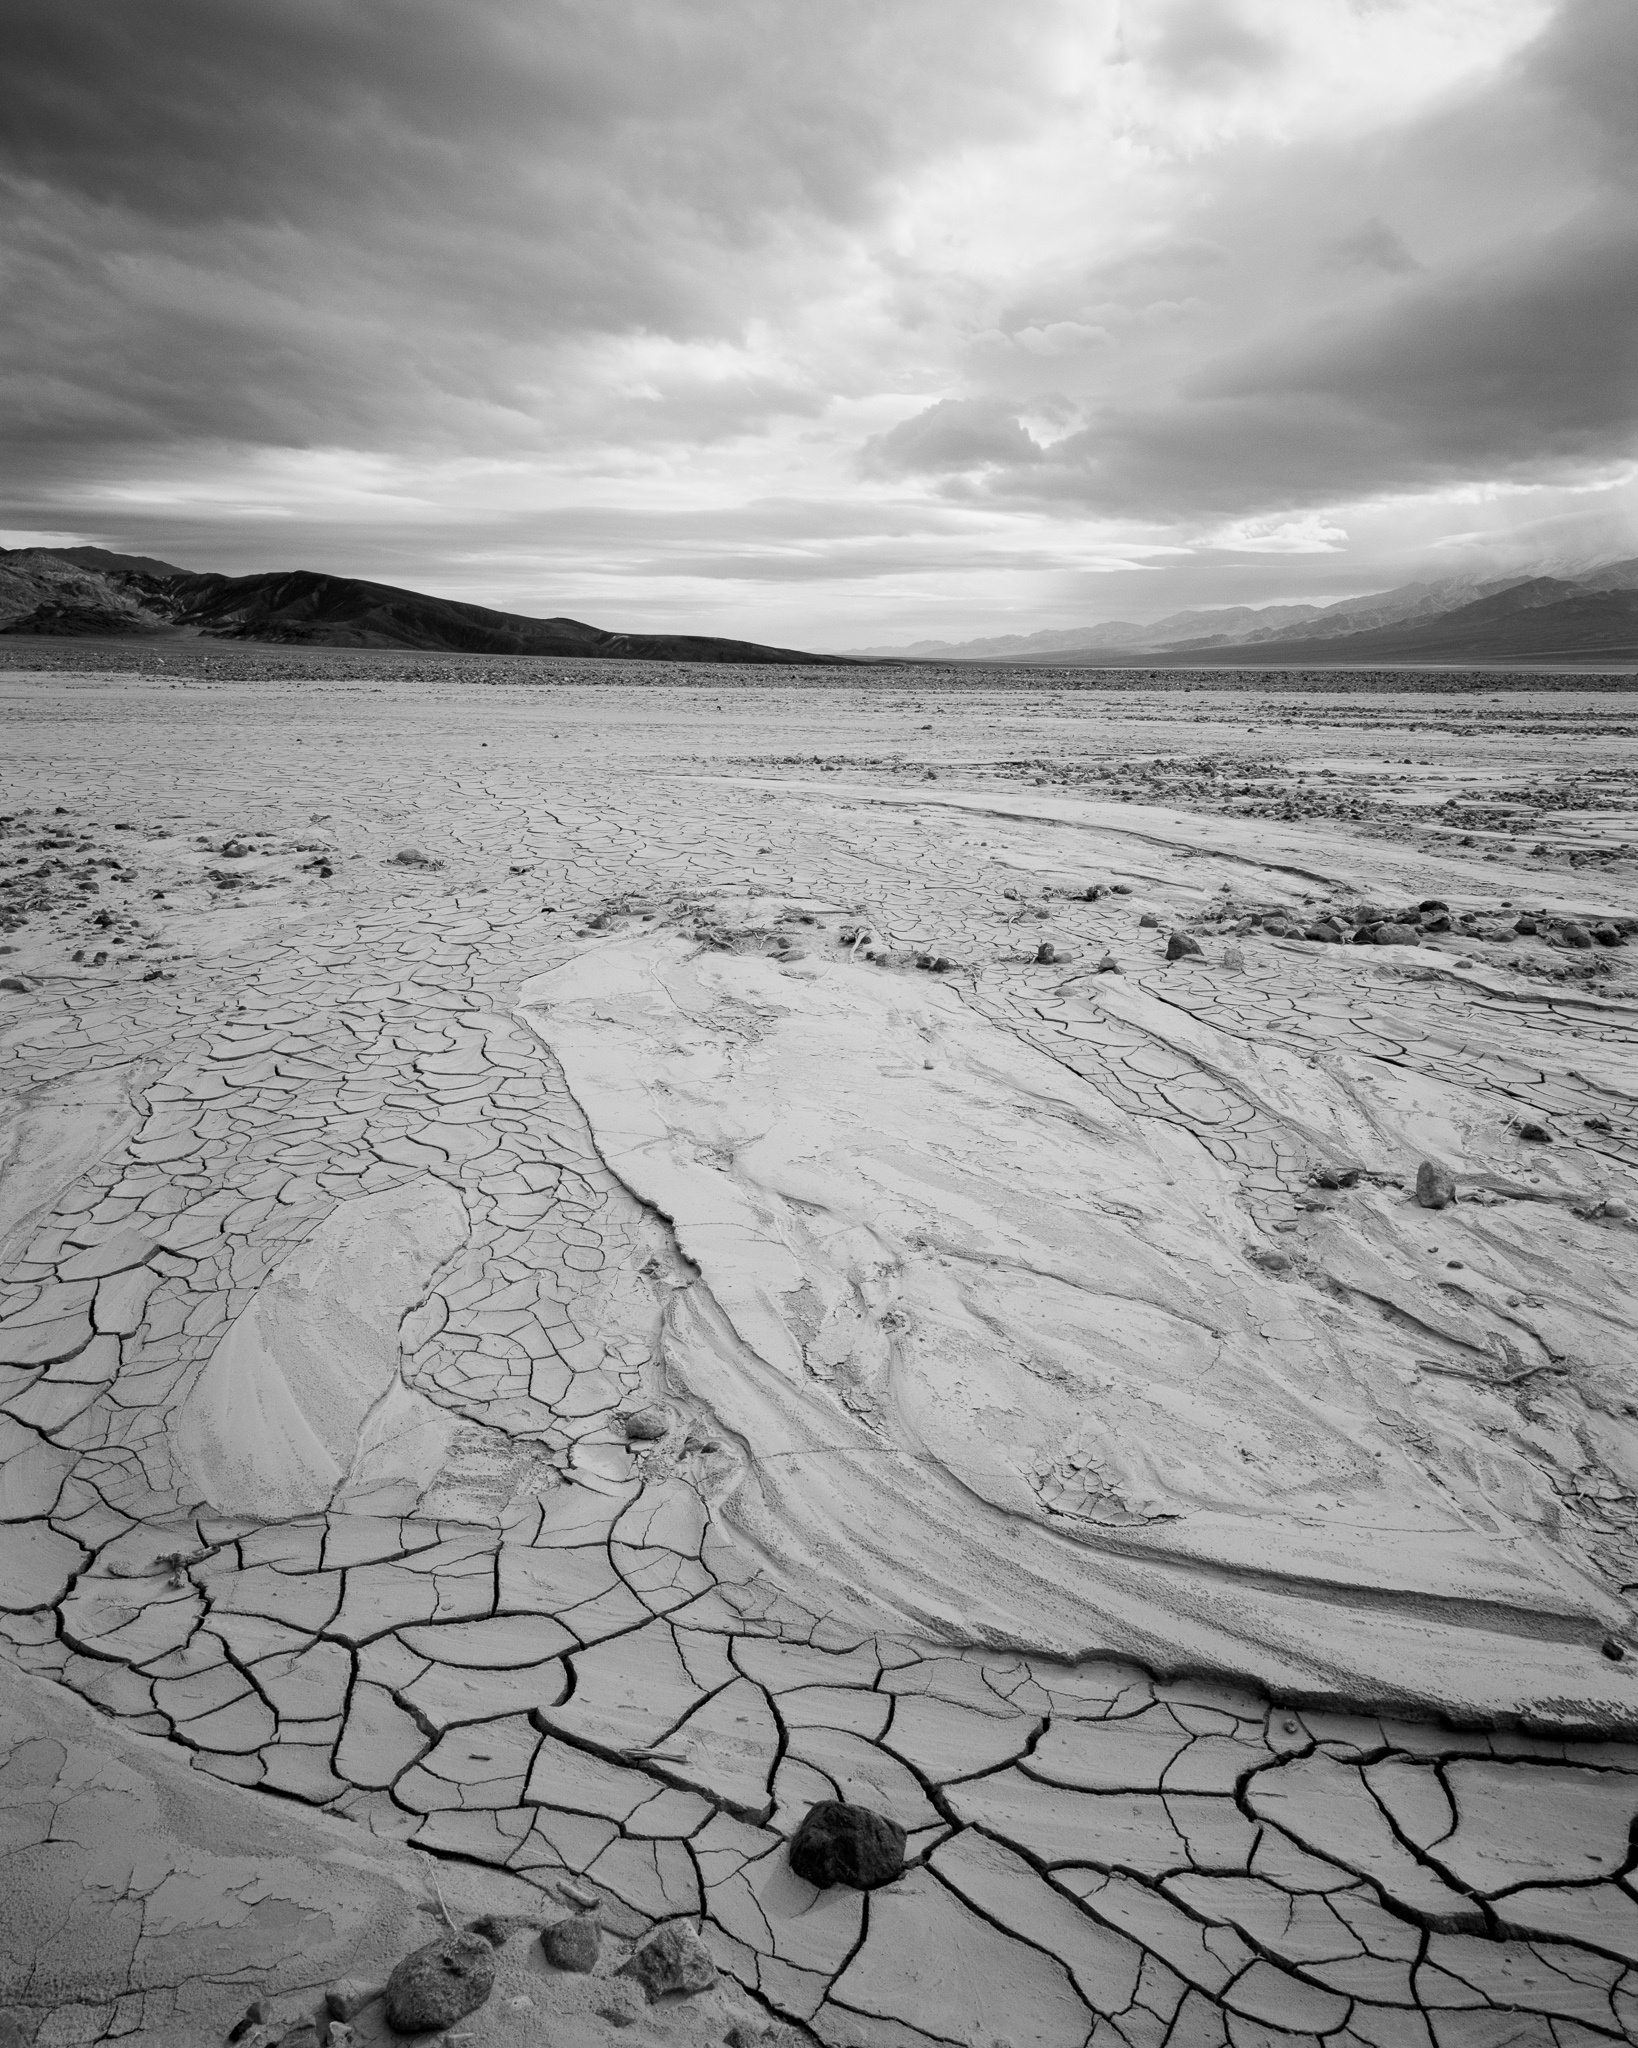
At 282 feet below sea level, Badwater Basin's vast salt flats create one of the most otherworldly landscapes in North America. The hexagonal salt formations, created by cycles of flooding and evaporation, extend for miles across the valley floor.
Best Conditions:
- Sunrise for warm light on Telescope Peak backdrop
- After rare rainfall for reflections (usually winter/spring)
- Blue hour for minimalist compositions
Composition Tips:
- Walk out onto the salt flats (carefully—the crust can be fragile)
- Get low to emphasize the salt polygon patterns
- Include the mountain backdrop for scale
- The "Badwater" sign makes for a classic foreground element
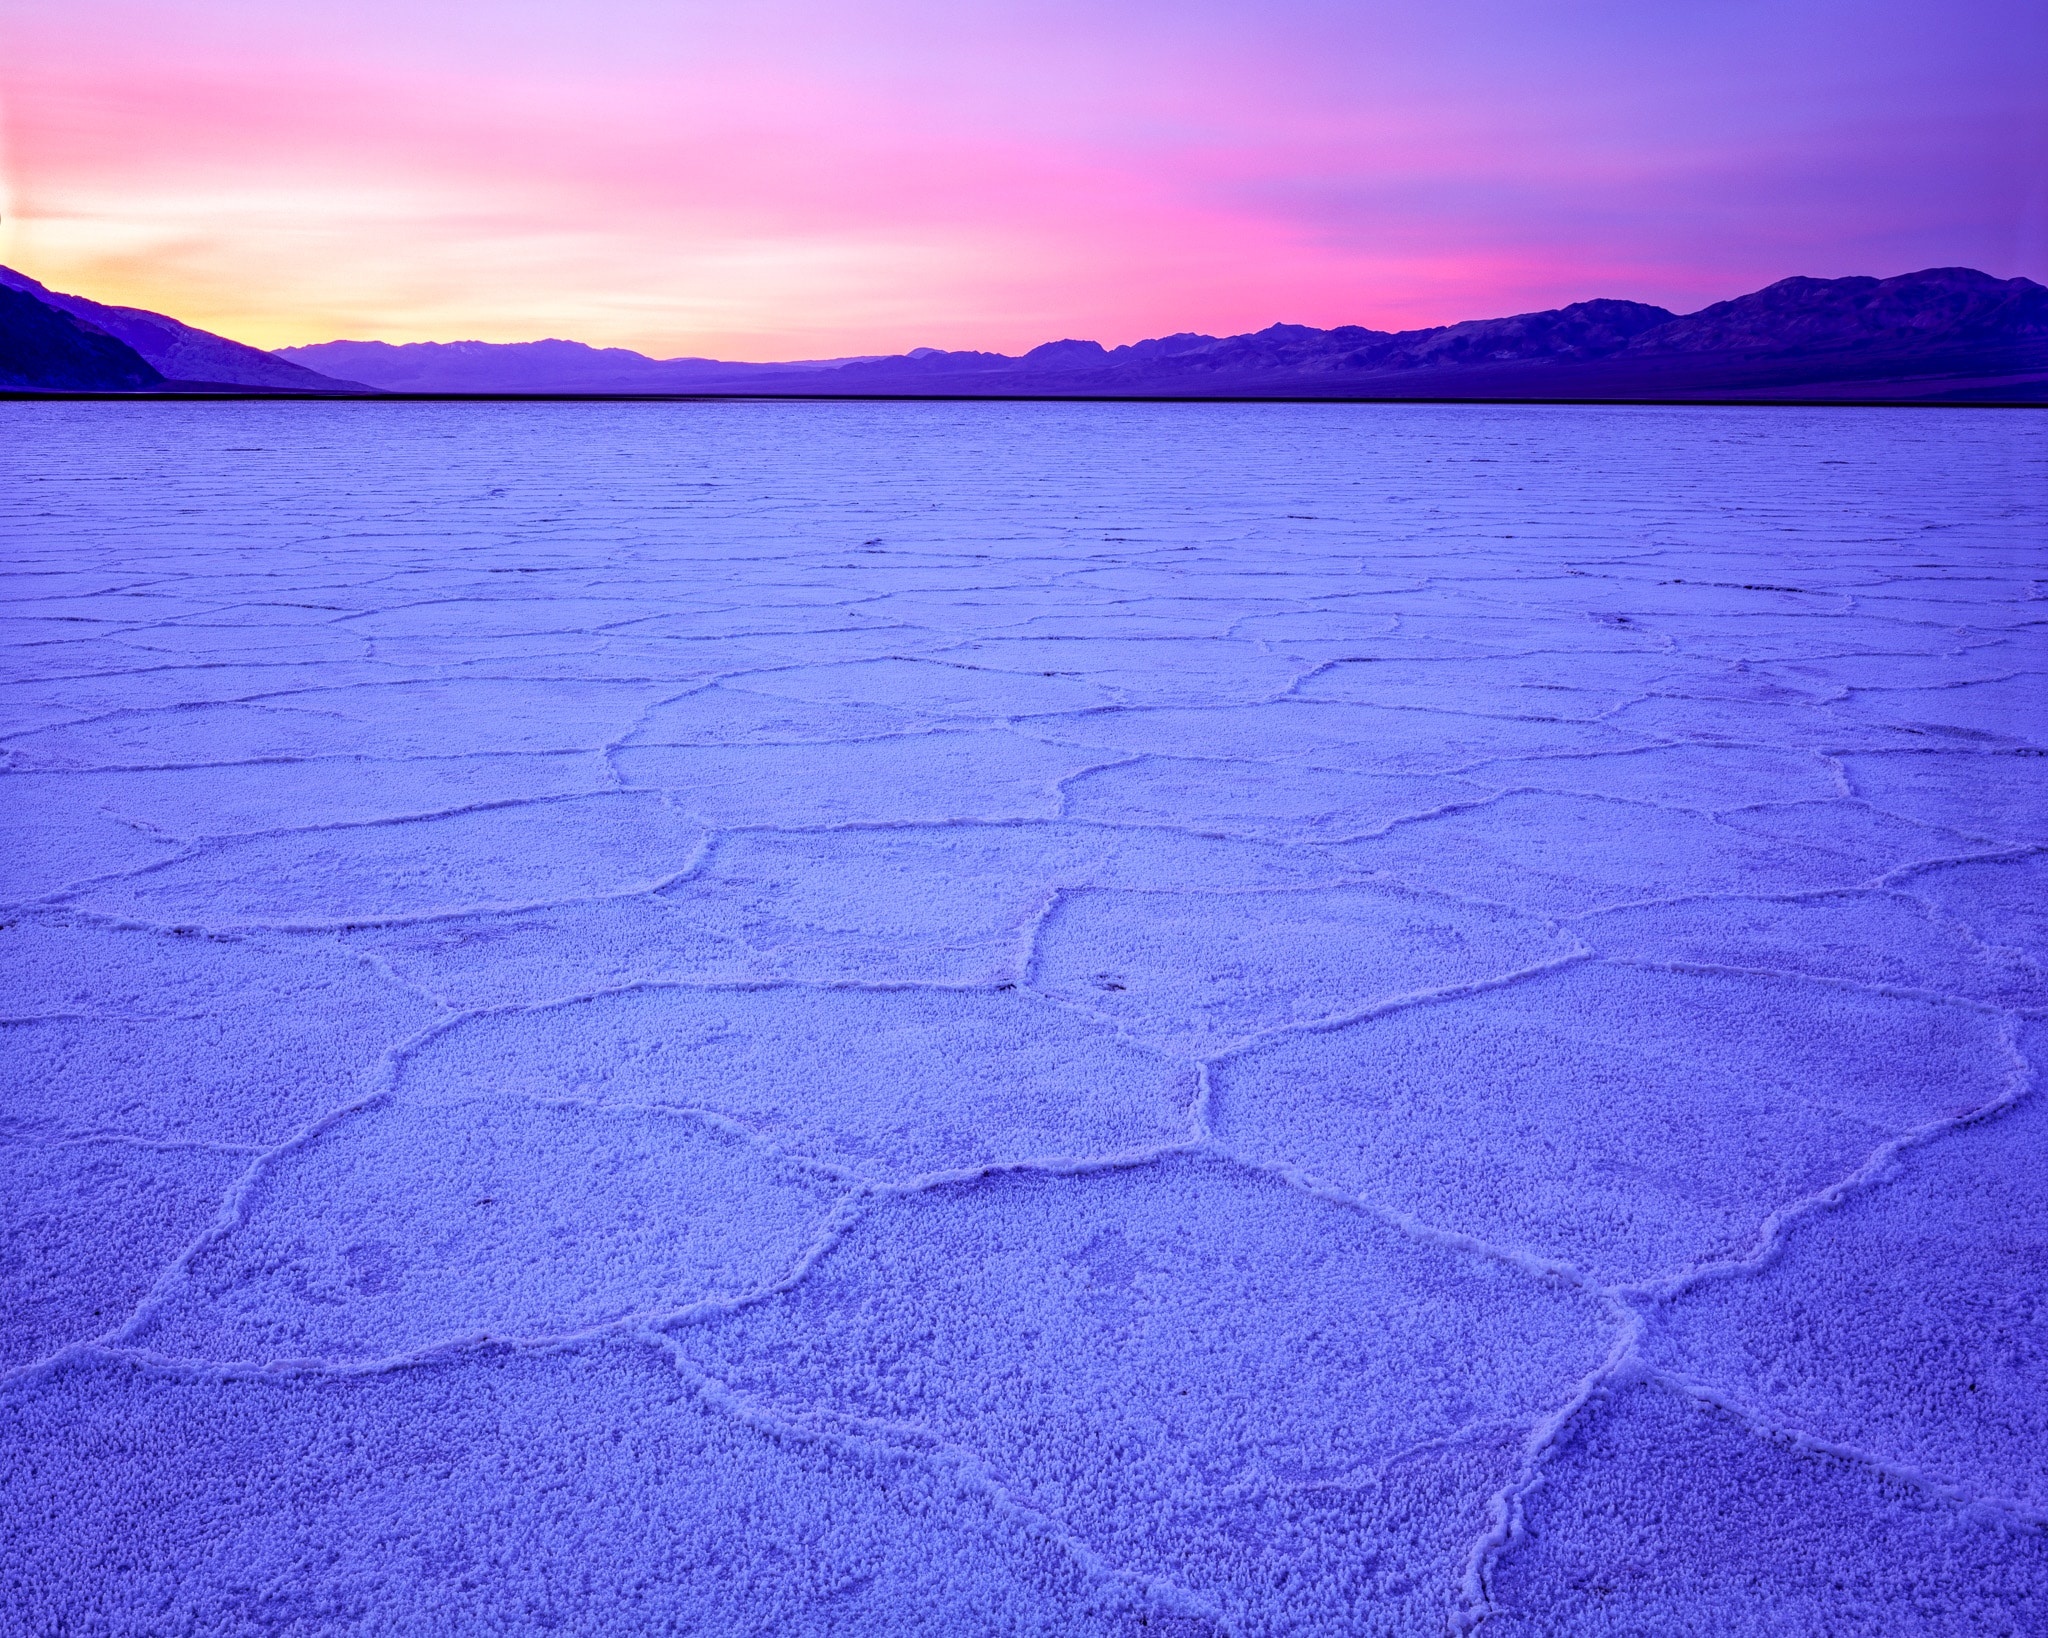
My Badwater Sunrise Reflection photograph captures rare standing water on the salt flats—conditions that occur only a few times per year after significant rainfall.

Badwater Sunrise Reflection - Rare standing water on the salt flats creates a perfect mirror at 282 feet below sea level, the lowest point in North America. View print details and purchase options →
2. Zabriskie Point
Perhaps Death Valley's most iconic viewpoint, Zabriskie Point overlooks a dramatic landscape of golden badlands formed from ancient lake sediments. The eroded mudstone hills create an almost Martian landscape.
Best Conditions:
- Sunrise: The formations face east and catch beautiful first light
- Overcast days reduce harsh shadows in the complex terrain
- After rain when colors are most saturated
Composition Tips:
- Arrive 45+ minutes before sunrise to secure a spot (popular location)
- Wide angle captures the expansive badlands
- Telephoto isolates individual formations and layers
- Stay after sunrise—sidelight creates drama as the sun rises higher
See my Zabriskie Point Sunrise and Zabriskie Point Black and White Panorama for different interpretations of this classic location.
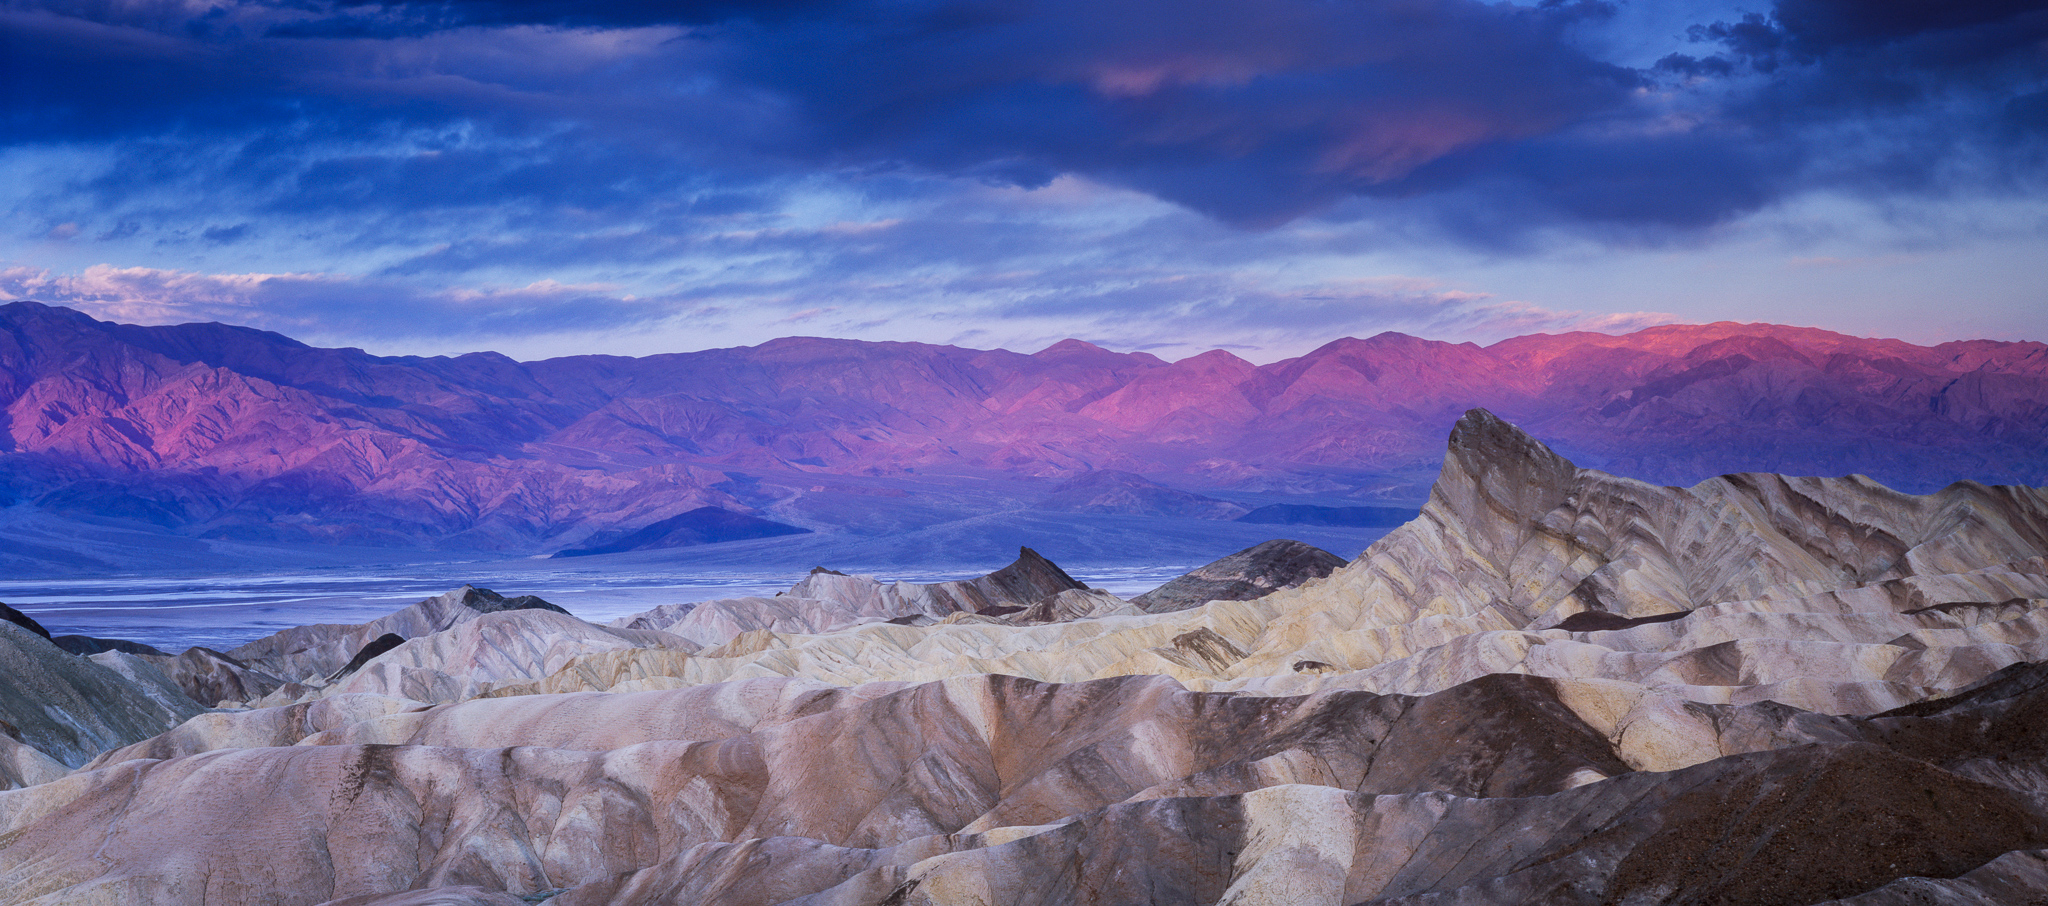
Zabriskie Point Sunrise - First light illuminates the ancient lake sediments that form Death Valley's most iconic badlands. View print details and purchase options →
3. Mesquite Flat Sand Dunes
These accessible dunes near Stovepipe Wells offer classic desert dune photography without requiring a difficult hike. The dunes rise to about 100 feet with beautiful ripple patterns and star dune formations.
Best Conditions:
- Sunrise/sunset for dramatic shadows defining the dune shapes
- Morning after overnight winds for pristine ripple patterns
- Avoid midday—flat light and extreme heat
Composition Tips:
- Walk beyond the first dunes—most photographers stop too soon
- Look for S-curves and leading lines in the dune ridges
- Footprints are unavoidable near the parking area; walk further for clean compositions
- Telephoto compression creates powerful layered dune images
Salt Flat Sunrise — Death Valley's vast salt pan at first light. Early arrivals get clean, undisturbed surface.
4. Dante's View
At 5,476 feet elevation, Dante's View provides a breathtaking overlook of the entire valley floor, including Badwater Basin far below. The temperature is typically 20-25°F cooler than the valley floor.
Best Conditions:
- Sunrise for front-lighting on the valley and salt flats
- Clear days for maximum visibility to the Sierra Nevada
- After storms for dramatic clouds and clear air
5. Artist's Palette
A colorful hillside showing volcanic deposits in shades of red, pink, yellow, and green. The 9-mile Artist's Drive is one-way and provides multiple pullouts.
Best Conditions:
- Late afternoon when the colors are most vibrant
- Overcast light reduces harsh shadows
- Polarizing filter deepens colors
6. Racetrack Playa (Remote)
Famous for its "sailing stones" that mysteriously move across the dry lakebed, the Racetrack requires a 27-mile drive on rough dirt roads (high-clearance vehicle required).
Important:
- High-clearance 4WD strongly recommended
- Flat tires are common—carry two spares
- No services for 50+ miles
- Plan for a full day trip
7. Additional Locations
- Golden Canyon: Short hike through colorful badlands
- Natural Bridge: Easy hike to impressive rock formation
- Ubehebe Crater: Volcanic crater with colorful walls
- Devil's Golf Course: Rugged salt formations
- Titus Canyon: Dramatic narrow canyon drive (one-way, high-clearance)
Technical Considerations
Equipment Protection
Death Valley's environment is hard on camera equipment:
- Heat: Keep equipment in cooler/shade; batteries drain rapidly in extreme heat
- Salt air: Corrosive to metal and electronics; wipe down equipment daily
- Dust/Sand: Fine particles infiltrate everything; use protective covers
- Dunes: Never change lenses on the dunes; sand will destroy your sensor
For Film Photographers
Film is particularly vulnerable to heat. Never leave film in a hot car—temperatures inside a parked vehicle can exceed 150°F. Keep unexposed film in a cooler (not directly on ice). Process film promptly after returning from Death Valley.
Recommended Gear
- Wide angle lens for expansive landscapes
- Telephoto for dune details and compressed perspectives
- Sturdy tripod (essential for blue hour and sunrise)
- Polarizing filter for sky contrast and reducing glare on salt flats
- Graduated ND filters for high-contrast sunrise/sunset
- Extra batteries (they die fast in heat)
- Lens cleaning supplies (dust is constant)
Sample Itinerary: 2-Day Photography Visit (Winter)
Day 1:
- 4:30 AM: Arrive Zabriskie Point for sunrise setup
- 8:00 AM: Breakfast at Furnace Creek
- 9:30 AM: Golden Canyon hike (morning light)
- 12:00 PM: Lunch, rest during midday
- 2:30 PM: Artist's Drive and Artist's Palette
- 4:30 PM: Badwater Basin for sunset
Day 2:
- 5:00 AM: Mesquite Flat Sand Dunes for sunrise
- 9:00 AM: Drive to Dante's View (cooler temperatures)
- 11:00 AM: Explore Devil's Golf Course
- Afternoon: Depart or continue to secondary locations
Where to Stay
The Inn at Death Valley: Historic luxury property at Furnace Creek. Central location, excellent for early morning departures.
The Ranch at Death Valley: More affordable option at Furnace Creek with cabin-style rooms.
Stovepipe Wells Village: Basic accommodations near the sand dunes. Good for dune sunrise photography.
Panamint Springs Resort: Western edge of park, quieter and cooler at higher elevation.
Camping: Multiple campgrounds available; Furnace Creek and Sunset Campground most popular. Winter reservations recommended.
Fine Art Prints
Death Valley Photography Prints
Shot on 4x5 large format film during winter visits when the light is low and the salt formations are at their best. Limited edition fine art prints, archival pigment on museum-grade paper.

Final Thoughts
Death Valley rewards photographers who respect its extremes and plan accordingly. The landscapes here—from the lowest point in North America to colorful volcanic hills, pristine sand dunes to alien salt formations—offer subjects found nowhere else on Earth.
The key is preparation: visit during cooler months, carry abundant water always, and never underestimate the desert's power. With proper planning, Death Valley delivers some of the most dramatic and otherworldly images possible in landscape photography.
If you're not making this trip — Death Valley in summer is genuinely dangerous and even in winter it requires planning most people don't do — the prints below are the result of multiple visits made safely, at the right time of year, when the light cooperated. Limited editions on ChromaLuxe metal, Lumachrome acrylic, or archival paper. Browse the full California landscape collection for additional work from the region.
Fine Art Prints
Not making this trip? Own the view.
These photographs required years of fieldwork, pre-dawn drives, and considerable luck with light. Limited editions on ChromaLuxe metal or Lumachrome acrylic — each with a certificate of authenticity and edition number.
Frequently Asked Questions
- When is the best time to photograph Death Valley?
- November through March. Winter temperatures stay in the 60–70°F range, the low sun angle creates dramatic shadows across salt formations and dunes, and the light is simply better. Avoid May through September — temperatures regularly exceed 120°F and create genuine safety risks for anyone spending time outdoors.
- What are the best photography locations in Death Valley?
- Zabriskie Point at sunrise, Badwater Basin for salt flat reflections and patterns, Mesquite Flat Sand Dunes at dawn, and Dante's View for the panoramic basin overview. Racetrack Playa is worth the rough 27-mile drive for the sailing stones. Each location has a distinct character and rewards different lighting conditions.
- What time should I arrive at Zabriskie Point for sunrise?
- At least 30 minutes before sunrise — the parking area fills quickly and the best compositions go to photographers who arrive early. The point faces east, so sunrise light hits the badlands formations directly. The pre-dawn blue hour is often as good as the sunrise itself and considerably less crowded.
- Is it safe to photograph Death Valley in summer?
- Not recommended. Valley floor temperatures regularly exceed 120°F, with ground temperatures 30–40°F higher. Car breakdowns in remote areas can become life-threatening quickly. If you must visit in summer, photograph only in the early morning (5–7 AM), carry multiple gallons of water, and inform someone of your itinerary.
- Where should I stay when photographing Death Valley?
- The Inn at Death Valley at Furnace Creek is the most central option for photographers — it puts you 5 minutes from Zabriskie Point and 15 minutes from Badwater. Stovepipe Wells Village is better positioned for the Mesquite Dunes at dawn. Book well in advance for winter visits; the park gets busy November through February.
Explore Related Photography
Enjoyed this article?
Subscribe for more photography stories, techniques, and exclusive behind-the-scenes content.
Related Posts
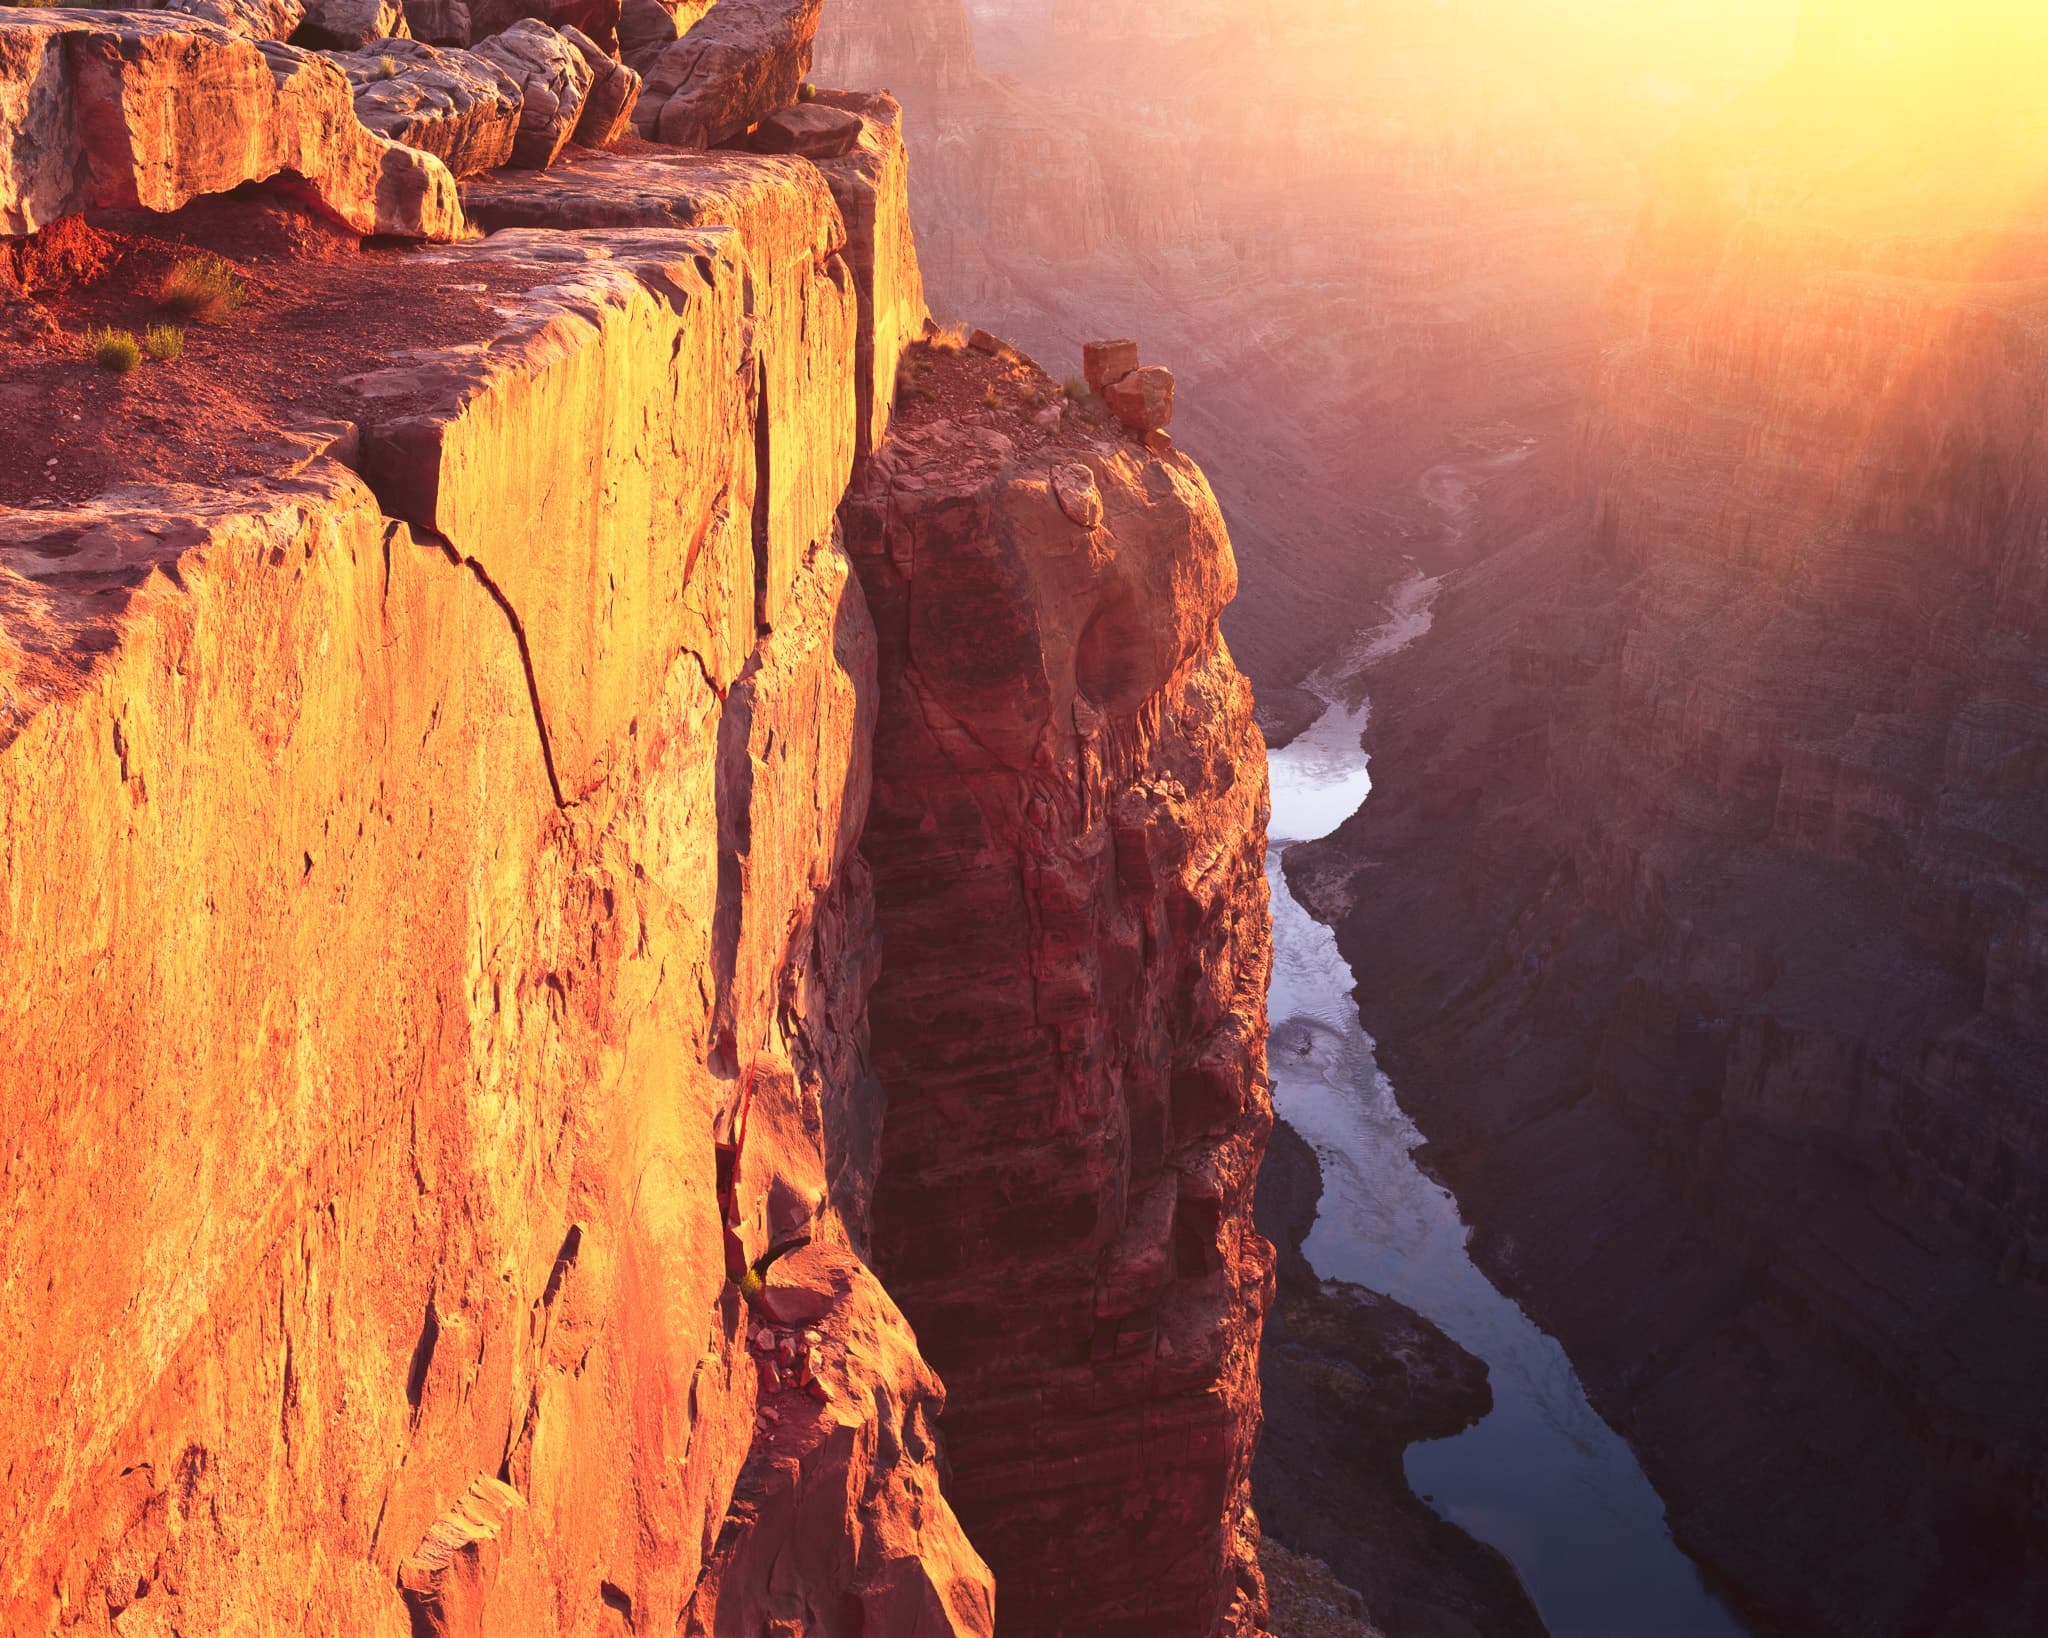
Grand Canyon Photography Guide: Best Spots, Light & Timing
The famous south rim overlooks are worth making. But the Grand Canyon images I keep coming back to came from a remote western overlook that requires 60 miles of unpaved road to reach — and from the North Rim in October, when the crowds are gone and the canyon light gets serious.

Best Places to Photograph Snow-Covered Mountains in Winter
Winter transforms mountain landscapes in ways no other season can. Where to go, when to go, and what to expect — from Yosemite's granite walls under fresh snow to Zion's red canyon in a storm.
Analog Landscape Photography: Why Film Still Makes Sense in 2026
Most photographers who've tried 4x5 large format film don't go back to digital for their serious landscape work. Here's the honest case for shooting analog in an era when you have no practical reason to.
Tags

Marty Quinn
Large format film photographer based in Phoenix, Arizona. Shoots on 4x5 Arca-Swiss view cameras across the American Southwest — Utah, Arizona, Death Valley, and the Colorado mountains. 25+ years behind the lens. Published in Outdoor Photographer magazine (The Last Frame, June 2008). About Marty →